A Complete DIY Guide for American Homeowners
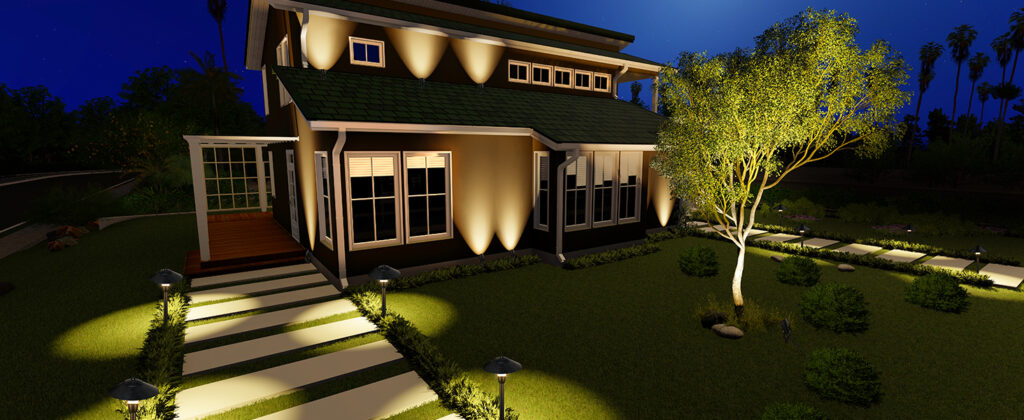
Transform your outdoor space into a stunning nighttime oasis with a professional-grade DIY installation. This step-by-step guide uses a 12 packet LED low voltage landscape lighting kit (complete with transformer, 100ft wire, and FastLock connectors) to help you achieve magazine-worthy results—no electrician needed.
Pre-Installation Planning: Design Like a Pro
- Map Your Lighting Zones:
• Identify key features: pathways, trees, architectural details, and seating areas.
• Use garden hoses or rope to outline wire routes and fixture placements. - Calculate Power Requirements:
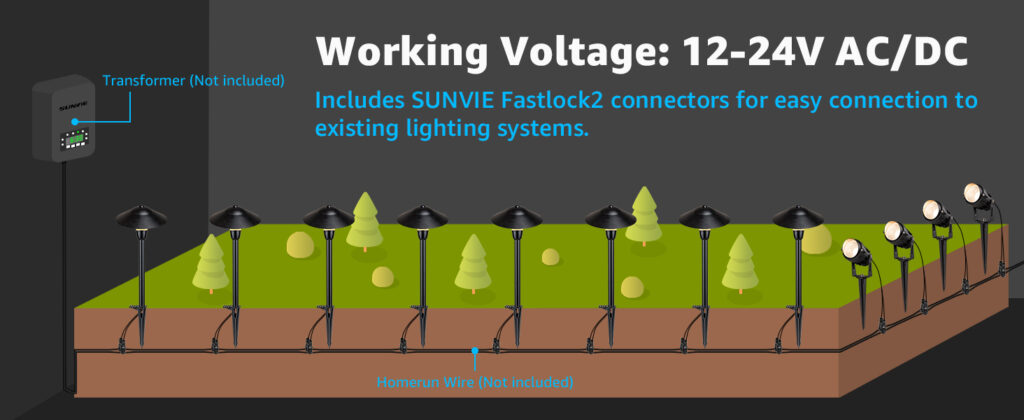
• Total wattage = (12 lights × 3W) = 36W. Your 60W transformer provides 24W of headroom for future expansion. - Optimize Wire Runs:
• Max wire distance: 70 ft for 16/2 AWG wire (included in kit) to prevent voltage drop.
• Use the “hub and spoke” method: Run main wire from transformer, then branch to light clusters.
Installation Phase: Tools & Techniques
Supplies Needed: Shovel, wire strippers, voltage tester, mulch/conduit (optional).
Step 1: Install the Transformer
• Mount within 1 ft of a GFCI outlet (required by NEC code)
• Attach wires:
- Black wire → “Common” terminal
- White wire → “12V” terminal.
• Enable photocell/timer to automate dusk-to-dawn operation.
Step 2: Bury the Wire Safely
• Dig a 6-inch deep trench (NEC minimum for low-voltage cables)
• For high-traffic areas:
- Use PVC conduit under driveways
- Cover wire with warning tape 2″ below surface.
Step 3: Connect Lights with FastLock2 System
• No stripping required:
- Push wire into connector’s bottom slot until it clicks.
- Insert light’s pigtail wires into top slots.
• Flexible layout: Place lights anywhere along the wire—no fixed spacing required.
Step 4: Position & Adjust Fixtures
• 90° beam angle: Aim spotlights upward for dramatic tree illumination.
• 270° adjustable heads: Angle lights to graze walls or highlight textures
• Secure stakes in soil; avoid over-tightening on roots.
Pro Tips for Peak Performance
• Prevent Voltage Drop:
- If adding lights beyond 70 ft, use 12/2 AWG wire for extensions.
- Connect lights in parallel, not series.
• Weatherproofing: - Seal connections with silicone gel (not included).
- Point wire openings downward to repel water.
• Lighting Design Secrets: - Use 3000K warm white for cohesion.
- Layer lighting: Combine spotlights (trees) with path lights (safety)
Troubleshooting Checklist
| Issue | Solution |
|---|---|
| Lights not turning on | • Test transformer output (should read 11-15V AC) • Reset timer/photocell |
| Flickering lights | • Check for loose FastLock connections • Trim vegetation touching fixtures |
| Dim fixtures at end of run | • Reduce total lights or upgrade to 12/2 AWG wire |
Why This Kit Beats Solar Alternatives
While solar lights seem easier, this 12V system delivers reliability (no dimming on cloudy nights), customization (exact placement), and longevity (aluminum housing vs. plastic solar units). The included UL-listed transformer and IP65-rated lights withstand rain, snow, and accidental impacts—critical for U.S. four-season climates.
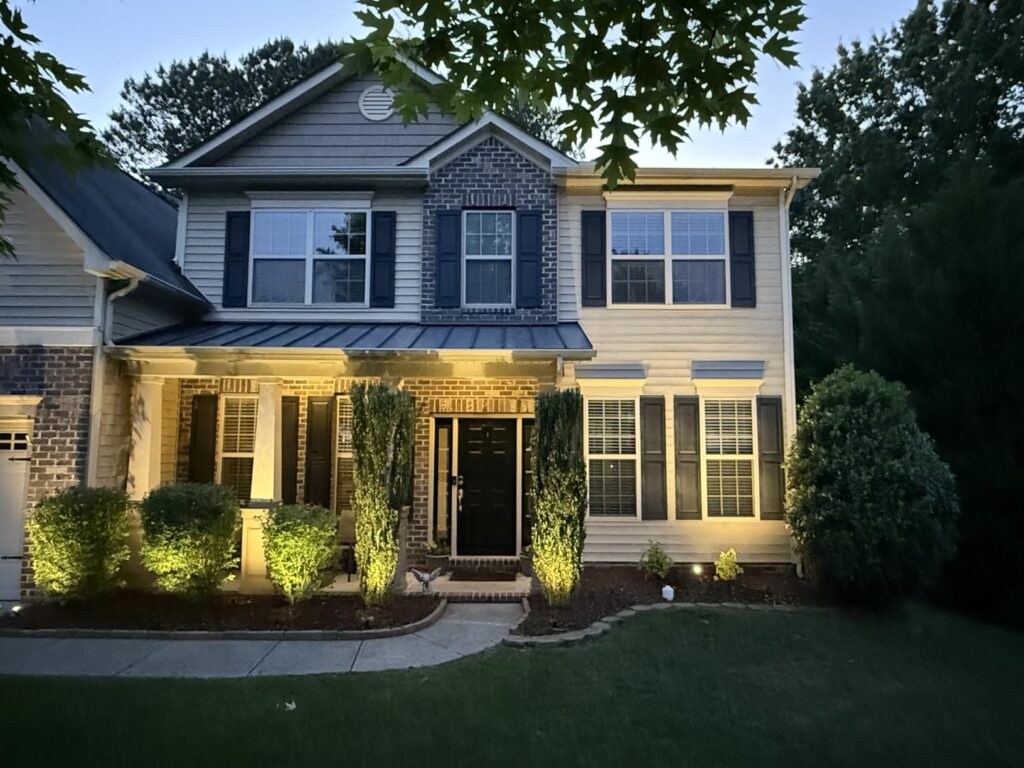
These little lights exceeded our expectations! They are well- made, metal fixtures that were easy to add to our existing low voltage lighting- and such an upgrade from the originals! Super bright, clear light that easily illuminates large trees, and even our 25 ft flagpole at night. We put them in 2 years ago, and they have been flawless. So impressed by these, and can’t recommend them highly enough!
Thanks, I get it.